Striped Baby Blanket – from pattern

The following post was originally written and published Summer 2015. It was temporarily removed from this site during a revamp, and can now be found in full, unaltered, below.


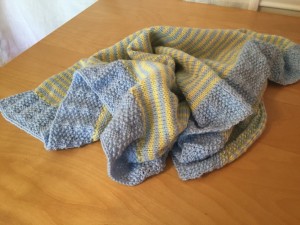
A friend of mine recently gave birth to an adorable baby boy and I wanted to give her a hand-knitted gift. In hindsight, I should have gone with a hat. But instead I chose to make a baby blanket, and it’s a good thing I started months in advance because that thing took forever! The blanket turned out really well if I do say so myself, and I’d like to share the pattern and some tips based on my experience.

2015-04-27 13.35.23

I received a Simple Knits: Blankets and Throws pattern booklet by Claire Crompton for Christmas 2014. Here’s the link to purchase the booklet on Amazon. There are several other interesting patterns that I’ll attempt when I’m retired or in limbo or otherwise have tons of time to devote to a project. The booklet is definitely worth the price if you enjoy sizable projects and are past being a “beginning knitter,” even though this particular pattern is at the beginner level.

The blanket is worked in two colors, beginning with a textured border in color A, followed by stripes of alternating colors, and wrapping up with a matching border in color A at the end. Any two colors of light weight baby yarn will do. Just head for the pastel section of the yarn aisle! You will need relatively small sized needles that are at least a foot long (you’ll be working with 157 stitches. Yes, you read that correctly), and I highly recommend wooden needles so that if your work gets tugged you are less likely to lose a substantial amount of stitches. As far as needle size, that depends on how thick/loose you want your finished product. Test a swatch in stockinette stitch.


THE BORDER

2015-04-27 13.35.48

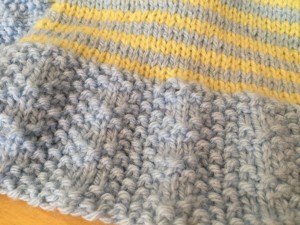
The pattern for the textured border as provided by the book is interesting and turns out nicely, but I think any border pattern of your own creation would work just as well. The pattern calls for frequent alternation between purling and knitting, which I suspect isn’t so tiring if you’re a continental-style knitter, but for me, the p1 k1 gig gets old real fast. To do it over again, I would alter the pattern to include longer stretches of either knitting or purling.


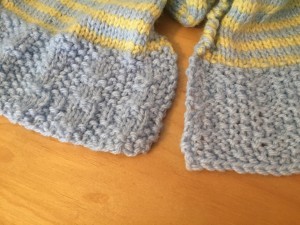
2015-04-27 13.37.32

It should be noted that by following the pattern exactly, the top and bottom borders are opposites when viewed from the same face of the blanket. See the picture? The entire blanket is face up. I noticed this a few rows in, but to be honest I was so mentally done with this project that I decided to just carry on without redoing those 785 stitches. If you create your own border design without face-specific details, you won’t have this problem. But if you follow the booklet and this discontinuity bothers you, just add an extra p1, k1 row before starting in on the diamonds, or reverse the instructions (purl when told to knit, and vice versa).


THE STRIPES

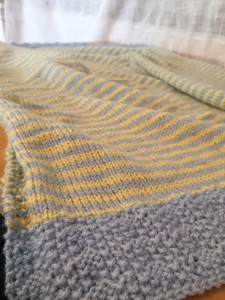
2015-04-27 13.38.13

Oh man, the stripes. Simple enough, but never-ending.

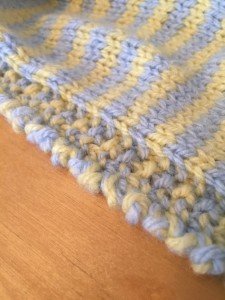
The pattern calls for a seed stitch border along the vertical edges of the blanket, worked in the stripes. This border helped to hide that I was using dual strands on one edge so that I could carry the previous color up the work instead of tying off after each stripe. Can you imagine having to sew in all those ends?? No thanks!


2015-04-27 13.37.14

The pattern required more stripes than I cared to knit, so I moved on to the final border with about 2 inches worth of stripes to go. I did this because the baby had been born and the darn blanket wasn’t going to be a square anyway, so what did it matter if my blanket was a slightly different rectangle than the pattern was designed to produce? I caution against lengthening the pattern if you want to maintain your sanity (unless you’re a seasoned blanket-knitter, in which case it’s too late for you!), but really you can tweak the dimensions as much as you want and still end up with a beautiful blanket.


THE END

Well believe it or not that’s all I have to say about that. The blanket was easy to make thanks to a simple pattern. There’s lots of potential for variation, which is awesome. Or you can rigidly adhere to the well-constructed pattern.
Weasley Sweater

After being coerced into reading Harry Potter by a couple of friends, I was inspired to make sweaters for said friends. Not just any sweaters though; these were Weasley sweaters, modeled after those that Mrs. Weasley makes as gifts for each of her family members (and Harry) every Christmas. In the books these sweaters are described as being boxy, over-sized, and bearing the first initial of the recipient…. That’s not much to go on if you’ve never made a sweater before. Luckily, a more experienced knitter (Alison Hansel) had already devised a pattern, and graciously posted it online for free. Check it out. In my endeavors with this pattern, I found it necessary to make a few adjustments, which I’ll explain below with the featured images.

One more quick note about making sweaters, if you’re a novice: It takes for freaking ever. Unless you’ve got enchanted knitting needles like Mrs. Weasley, you’re going to be spending a lot of hours on this project. I made the mistake of promising these sweaters as Christmas gifts, and ended up having them done for my friends’ birthdays (both of which are in August — oof). So yeah, unless you have a significant amount of free time each day, perhaps don’t give yourself a deadline! That being said, I’ve been assured these sweaters are worth the wait.


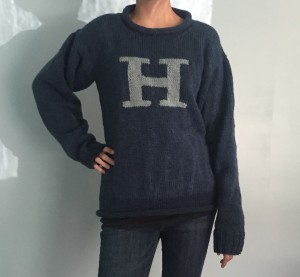
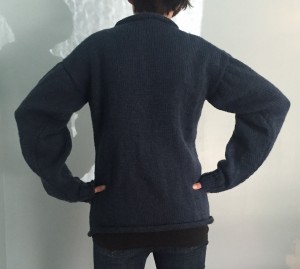
2015-08-03 12.09.30 (3)   2015-08-03 12.09.59 (2)

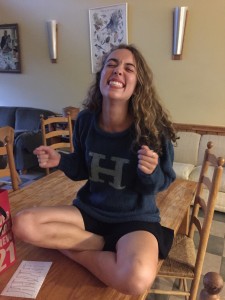
Sweater #1, for H. I’m the one modelling in this pic, but H is my size, so this is an accurate representation of the fit. This sweater was an adult medium. I am writing up this post two years (eek) after I gave away my creations, and unfortunately it appears that I did not take pictures of sweater #2. This second sweater featured an S, which was quite a complicated letter to devise a patter for. I turned to the internet for basic letter S knitting patterns in order to get an idea of the dimensions and ratios. Neither sweater featured the suggested yarn or colors. As long as the yardage and weight are correct, I buy whatever yarn I want!


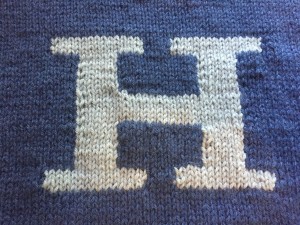
2015-08-03 12.03.39

Hansel’s pattern offers both child and adult sizes for the sweater, however, only two sizes of the letter H are demonstrated: one for a child’s small and another for every other size. A 32 by 22 stitch letter may look fine on a medium-sized child, but it’s going to look quite different on an XXL adult. I grabbed some graphing paper and a pencil and beefed out the “H”. For my adult medium sweater I ended up with a 32 x 32 stitch “H” with lines that were double the suggested width (4 rows instead of 2, 6 stitches instead of 3, etc.). I highly recommend adjusting the pattern to taste in this regard, and Hansel makes it easy. She offers directions for two methods of adding the initial: intarsia (in layman’s terms: changing colors as you go), or duplicate stitch (adding the letter in the second color onto the finished piece). I used the intarsia method without much forethought, but if you’re hesitant to knit up your altered pattern without knowing how the proportions will look, then I recommend adding the letter on after, using the duplicate stitch method.


2015-08-03 12.03.59 2015-08-03 12.03.30

2015-08-03 12.03.35

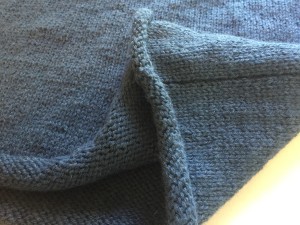
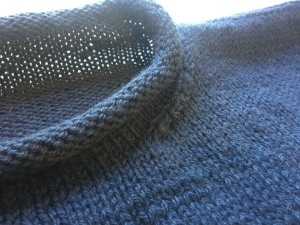
The stockinette stitch pattern creates this nice rolling of the hem and collar. On the collar, this rolling conveniently masks the seam of where the shoulder and neck are joined together.


2015-08-03 12.03.54

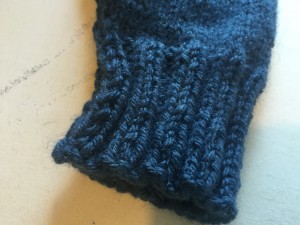
The cuffs are tapered with a knit 2, purl 2 ribbing. If I had to make another of these sweaters (not for a while, please), I would consider adopting this ribbing for the hem as well. That would follow my personal preference to feel that the hem of my top was grounded.


2015-08-03 12.04.24

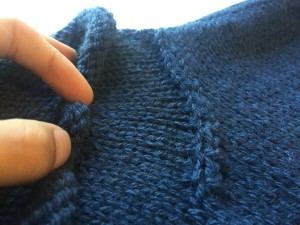
When I made this sweater, I was very inexperienced at joining pieces together. Consequently, when I picked up stitches to start the arms, I thought I needed to pick up each consecutive loop until I had the corresponding number of stitches. This might work for some people, but unfortunately my loose knitting created this bunching of material that you see above. Now I know that I should have factored in my gauge.

For example, the sleeves for the child’s small require 60 stitches. Instead of picking up 60 stitches straight, I would take a measurement from some of my finished work, to figure out how many inches 60 stitches would be. Let’s say it was 20 inches (that’s more than the suggested gauge of 15″). I would measure 10″ down from the shoulder seam on the front, and 10″ down from the shoulder seam on the back, and in between those two marks I would pick up 60 stitches. Complicated, but a necessary calculation to make if you don’t knit to the gauge, and care about bunching.


2015-08-07 20.20.04

H said her sweater was worth the wait, and her enthusiasm made it worth the work!